|
 |
 |
 |
 |
 |
 |
 |
 |
 |
 |
 |
 |
||||||||||||
 |
|
|
|
 |
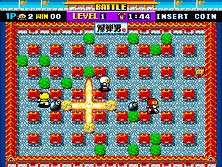
  Dick Dynamite: tile-based games basics Dick Dynamite: tile-based games basics[ June 21, 2003 ] by Marco Lapi, a.k.a Lapo Tile based games have been very popular in the 80's and many of you surely spent alot of time with them on a number of platform (Spectrum, C64, MSX, Atari ST, Amiga...) and different consoles/coin-ops! This tutorial illustrates the basic informations behind this game development tecnique. |
||||||||||||||||||||||||||
WHAT DOES "TILE-BASED" EXACTLY MEANS Tiles are basically small square images that are used to compose a bigger picture just like you would do in a puzzle game. In DickDynamite we used the same principle, using a 20x20 grid to generate our mazes and creating many different "blocks" to create the environment. To create a tilebased game you should start by defining a "grid" and a tile size: the grid will hold all of the tiles, and the tile size is chosen basing on the dimensions of the grid. In our example we will be using a 20x20 grid and we will set the tile size to 20 pixels so that the whole game area is 400x400 pixels wide. Next thing to do is creating a 2 dimensional array that will hold all the cells of our grid: The array will also be used for drawing the map on screen: for our sample we just use 1 tile, so in the map we can set every cell that contains a tile to 1 and every other cell to 0. This code generates a 20x20 map using a bi-dimensional array:
function generateMap()
{
	map = new Array();

	map[0]  = new Array(1,1,1,1,1,1,1,1,1,1,1,1,1,1,1,1,1,1,1)
	map[1]  = new Array(1,1,0,0,0,1,0,0,0,1,0,0,0,1,0,0,0,1,1)
	map[2]  = new Array(1,0,0,1,0,0,0,1,0,0,0,1,0,0,0,1,0,0,1)
	map[3]  = new Array(1,0,1,1,1,0,1,1,1,0,1,1,1,0,1,1,1,0,1)
	map[4]  = new Array(1,0,0,1,0,0,0,1,0,0,0,1,0,0,0,1,0,0,1)
	map[5]  = new Array(1,0,0,0,0,0,0,0,0,0,0,0,0,0,0,0,0,0,1)
	map[6]  = new Array(1,1,1,0,1,1,1,1,1,1,1,1,1,1,1,1,1,0,1)
	map[7]  = new Array(1,0,0,0,0,0,0,0,0,0,0,0,0,0,0,0,0,0,1)
	map[8]  = new Array(1,0,1,1,1,1,1,1,1,1,1,1,1,1,1,1,1,1,1)
	map[9]  = new Array(1,0,0,0,0,0,0,0,0,0,0,0,0,0,0,0,0,0,1)
	map[10] = new Array(1,1,1,1,1,1,1,1,1,1,1,1,1,1,1,1,1,0,1)
	map[11] = new Array(1,0,0,0,0,0,0,0,0,0,0,0,0,0,0,0,0,0,1)
	map[12] = new Array(1,0,1,1,1,1,1,1,1,1,1,1,1,1,1,1,1,1,1)
	map[13] = new Array(1,0,0,0,0,0,0,0,0,0,0,0,0,0,0,0,0,0,1)
	map[14] = new Array(1,1,1,1,1,1,1,1,1,1,1,1,1,1,1,1,1,0,1)
	map[15] = new Array(1,0,0,0,0,0,0,0,0,0,0,0,0,0,0,0,0,0,1)
	map[16] = new Array(1,0,1,1,1,1,1,1,1,1,1,1,1,1,1,1,1,1,1)
	map[17] = new Array(1,0,0,0,0,0,0,0,0,0,0,0,0,0,0,0,0,0,1)
	map[18] = new Array(1,0,1,0,1,0,1,0,1,0,1,0,1,0,1,0,1,0,1)
	map[19] = new Array(1,1,1,1,1,1,1,1,1,1,1,1,1,1,1,1,1,1,1)
}
Don't get scared by this one. This is just what the map looks like in memory, we have done this manually just for the What's going on here ? Now that you have defined a map, it's time to write some code and see how to draw this on screen:
function drawIt(theMap)
{
	var pos = 0;

	for (var y=0; y<20; y++)
	{
		for (var x=0; x<20; x++)
		{
			pos = x + (y * 20)

			if (theMap[y][x] == 1)
			{
				_root.attachMovie("myTile", "tile_" + pos, pos)

				_root["tile_" + pos]._x = x * 20;
				_root["tile_" + pos]._y = y * 20;
			}
		}
	}
}
The drawIt() function takes the array as an argument and cycles through it, when an item is set to 1 it attaches a new Note that every tile is instantiated with a different name, so that can be referenced via actionscript. The variable named pos calculates the absolute index of the tile (from 0 to 399) so that this index can be added to the The expression in the square brackets ( _root["tile_" + pos]._y = y * 20; ) is very similar to writing something like:
tmpClip = eval("_root.tile_" + pos)
tmpClip._x = x * 20;
This evaluates the instance name of the mc attached to the _root, so that we can modify its properties. Finally we can sum up what we have done so fare in 3 steps: 1) choose a tile size (ex: 20x20 pixels) and a grid size (ex: 20x20 tiles) Once you have gained some confidence with this approach you can try to expand it, by adding more tiles and creating a simple |
||||||||||||||||||||||||||

|
||||||||||||||||||||||||||
|